
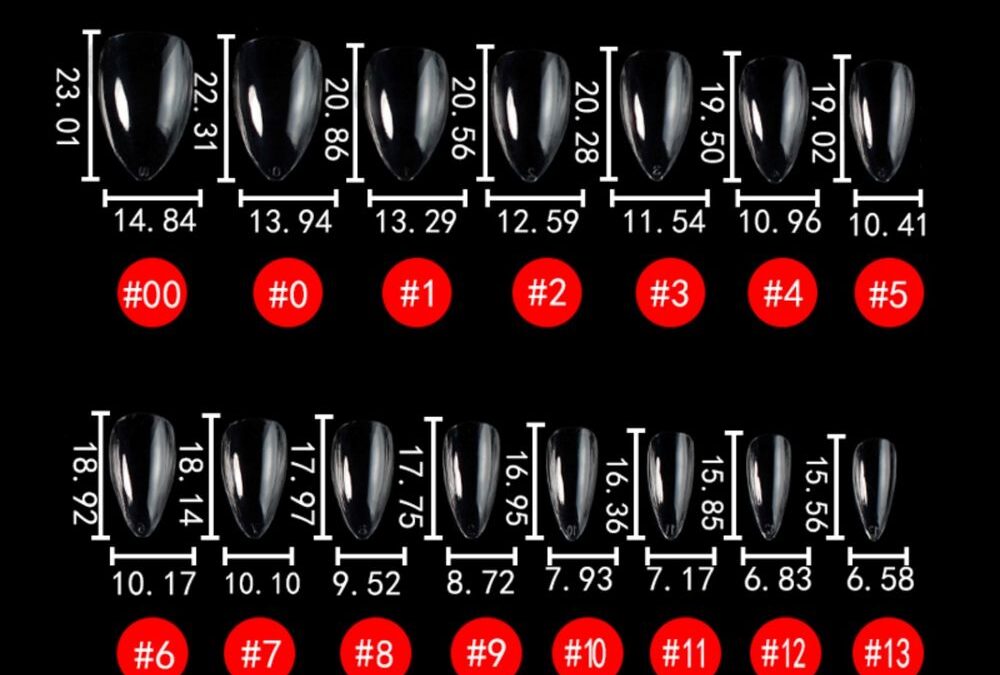
Definition: the natural almond short size guide explains how to measure nail beds and select the exact size from the Natural Almond (Short) black-box full-cover soft-gel tips so you can fit extensions quickly without sacrificing comfort or retention.
How do I set up to measure fast without losing accuracy?
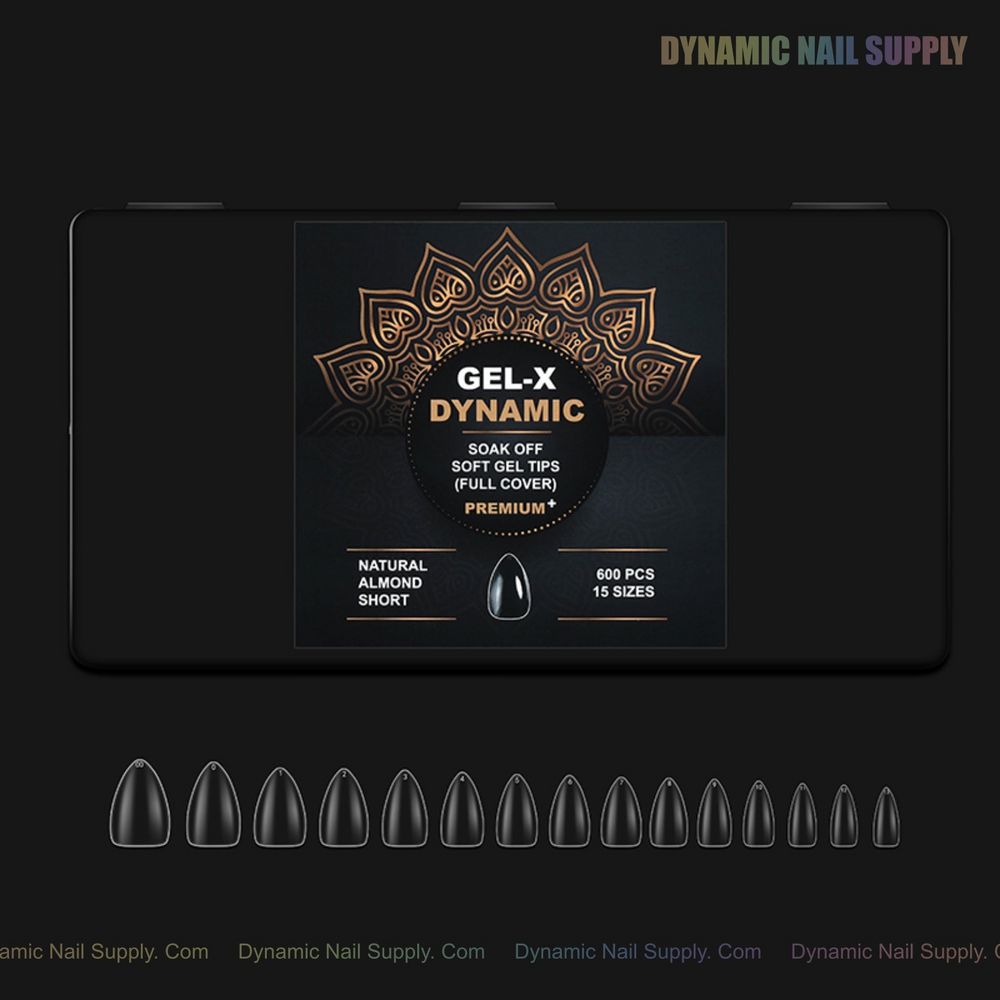
Start by creating a small, calm workspace where you can see both hands clearly and keep the black box within reach; the box’s glossy black surface and metallic-gold mandala label make it easy to spot the separate size compartments, so open those three top tabs and arrange the 15 sizes in a single row from smallest to largest. Use a soft gray towel or bright white surface beneath the client’s hand to improve contrast against the clear tips and the small pale nude nail icon printed on each size for quick visual confirmation. Keep a fine white marker or adhesive note nearby to mark sizes when you try them on, and have a 180-grit buffer, a cuticle pusher, and a small LED lamp ready so you can move through measurement, prep, and a flash cure without delay.
What’s the fastest, most repeatable way to measure each nail bed?
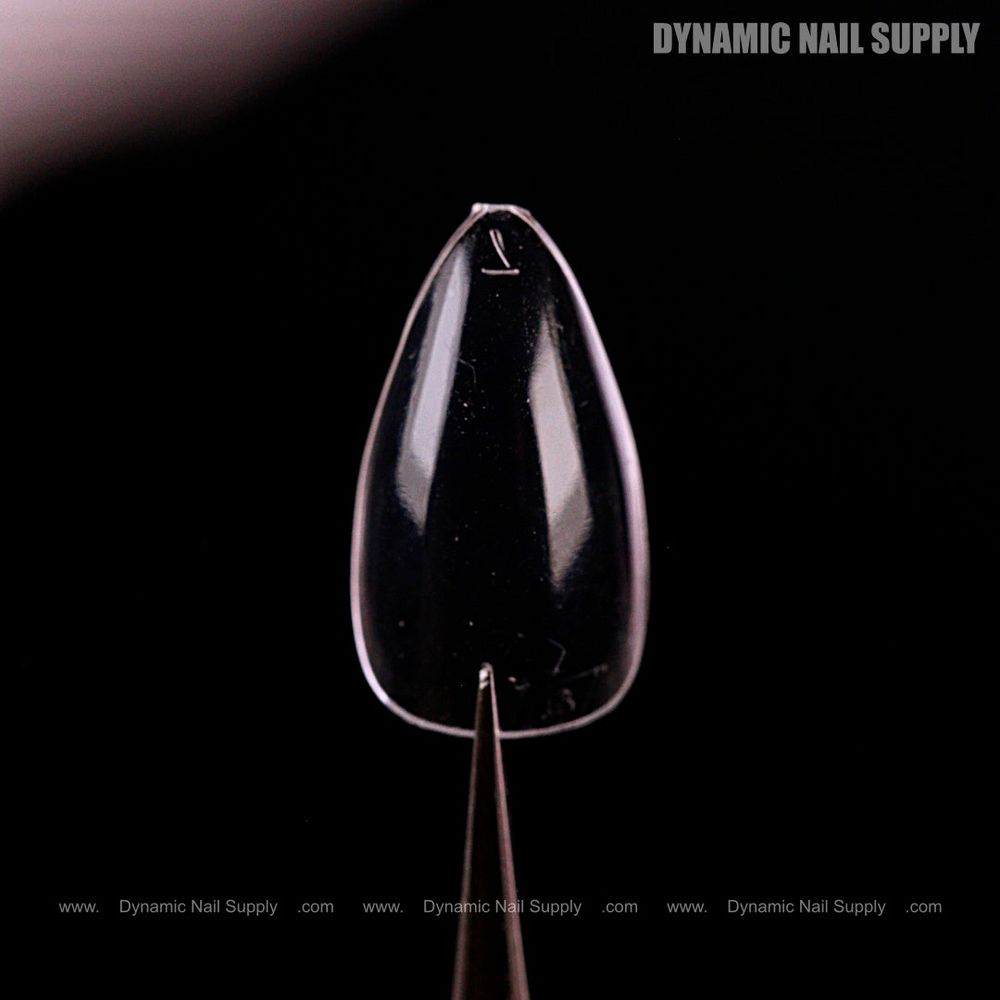
Measure one hand at a time, working from thumb to pinky, and use the same sequence every appointment so you build muscle memory: gently press the tip’s widest point against the client’s nail near the lateral folds, aligning the tip’s curve so the cuticle edge sits snugly without any overhang or visible gap. If the tip sits off-center by more than 0.5 mm, try the next size up or down; the printed size number on each clear tip speeds this step because you can immediately see the match. For speed, pre-pick three likely sizes for each finger (best guess, one smaller, one larger) and hold them in a line while the client flexes the finger—this avoids returning to the box repeatedly. When a tip covers the sidewall without pinching the cuticle and shows no daylight gap, mark that size and move on. Repeatability comes from always checking the same visual cues: no sidewall overhang, no pressure at the cuticle, and the tip’s base following the natural nail curve.
How do I translate those trial fits into the 15-size system quickly?
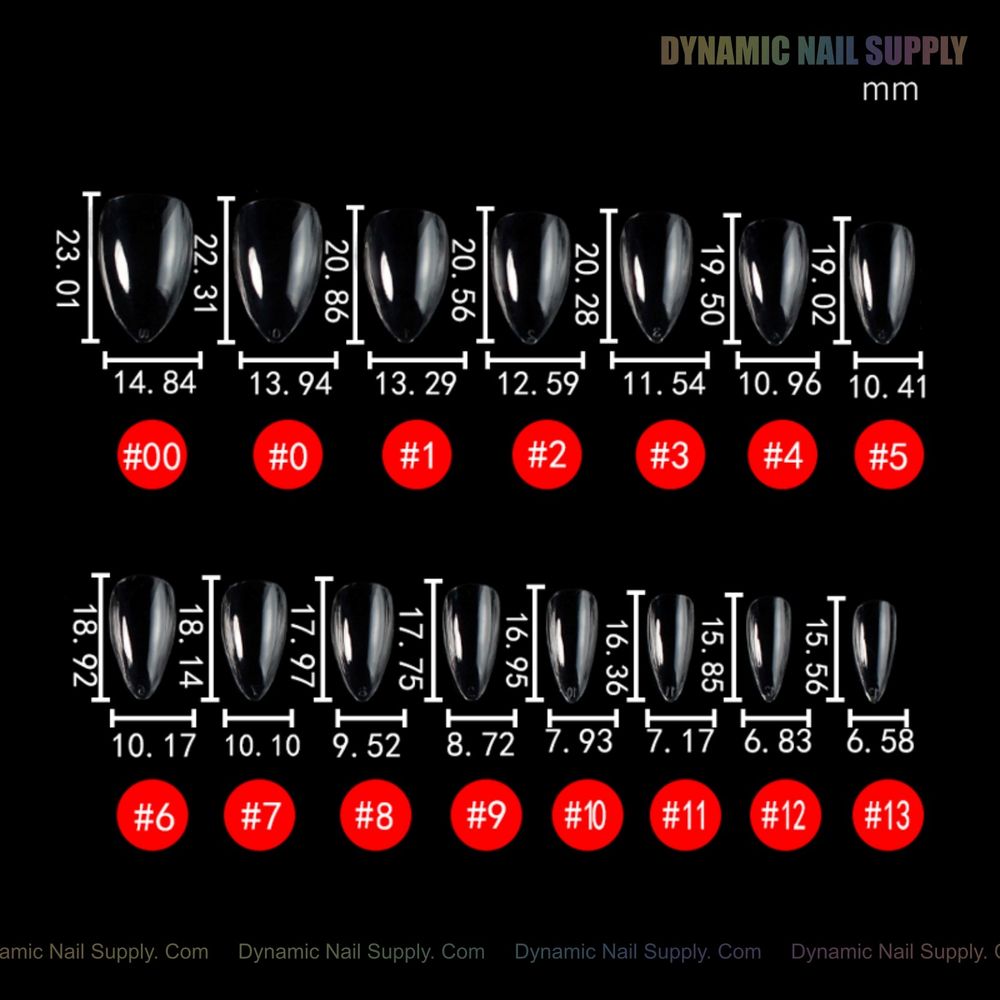
The black box is organized by size, each size packaged separately; once you have a fitting for the first hand, mirror the sizes for the opposite hand only after confirming for fit, because natural nail beds can differ slightly between hands. If you find many fingers need intermediate fits, use the box’s clear size numbers to choose the closest standard size and then plan to fine-file the edges later instead of forcing a too-tight tip. Keep in mind this particular Natural Almond (Short) style is cut for a short almond silhouette—it’s designed to sit close to the cuticle line and to be trimmed and shaped if you need a slightly narrower appearance at the sidewalls. The box contains 600 pieces total across 15 sizes, so for busy days you can afford to set aside a handful of pre-sorted sizes for the next client without affecting inventory.
When should you pick a size up or down to avoid lifting or discomfort?
Choose one size larger when the natural nail has a shallow lateral curve or when the nail bed widens toward the free edge; choosing a slightly larger base reduces the risk of pinching the natural nail at the cuticle, which is a common cause of lifting. Select one size smaller when the nail has pronounced sidewall curvature and the larger options leave a visible gap that allows air or product to pool. Avoid forcing a tip that requires excessive lateral pressure to seat; that pressure creates tension and early lifting even if the tip initially looks centered. The soft-gel material used in these full-cover tips flexes more than hard plastic, so a marginally looser base will often settle and bond well when you follow the prep and bonding steps, but never compromise the cuticle fit for speed.
What prep steps can you never skip even when you are rushing?
Rushing does not mean skipping the fundamentals: lightly buff the natural nail with a 180-grit buffer to remove surface shine, clean the nail thoroughly, and apply a dehydrator followed by a max bond primer. These steps remove oils and improve adhesion dramatically, and they are quick to perform if your station is organized. When you fit the Natural Almond (Short) tips, prep the underside with a buffer before applying Extend Gel or All-in-1 Glue Gel to the tip; seat at a 45° angle, press forward to evacuate air, hold, flash cure, then cure the full hand for 30 seconds under the LED lamp. Skipping dehydration or max bond is a common time-saving mistake that often results in lifting within days; those 60 seconds of prep are worth the time when the goal is long wear.
How do I finish trimming and shaping quickly while keeping an elegant look?
Trim each pre-chosen tip to the short almond length you need, then use a fine file to softly blend the sidewalls and remove any micro-gaps. Because the tips arrive with a high-gloss finish and a strong clear base, light shaping retains the glossy surface; avoid aggressive e-filing on the tip’s base as it can thin the material. For a bridal or minimalist look, accent one or two nails with a narrow metallic-gold detail or leave the tip’s pale nude presence under a high-shine topcoat to match the box’s luxe presentation. A final wipe with isopropyl alcohol before topcoat ensures no residue interferes with curing.
Which common mistakes cause returns and how do you avoid them?
The three mistakes that create the most rework are: forcing the wrong size, skipping dehydration/primer, and trapping air beneath the base. Avoid forcing a too-small tip by confirming that no part of the tip rests on the proximal fold and that the sidewalls are aligned. Prevent air by pressing gently forward at a 45° angle during placement and flash curing while holding pressure. Finally, always confirm that you have used a compatible gel adhesive and cured the full hand for the recommended 30 seconds to start retention off correctly. These measures take little time but save multiple follow-ups.
Safety and handling notes
Handle the glossy black storage box and the clear tips gently to avoid surface scratches; do not use solvents that are not recommended for soak-off soft-gel materials. When filing tips or trimming material, wear a mask and keep dust extraction active if available. These tips are designed for soak-off removal, so plan your removal chemistry and timing accordingly and avoid excessive force when lifting to prevent natural nail damage.
Price note: the box retails for $12 at the time of this writing; prices may change.
For a place to check product specifics and buy quickly, visit this resource:
Checklist Recap (numbered):
- Set up: open black box, lay sizes in order, clear workspace.
- Measure: thumb-to-pinky, align base, look for no overhang or pinching.
- Pre-select: pick three candidate sizes for each finger to speed trials.
- Prep: 180-grit buff, clean, dehydrator, max bond—don’t skip.
- Apply: buffer underside, 45° seat, press forward, flash cure, 30s full cure.
- Finish: trim to short almond shape, soft-file edges, topcoat and cure.
- Safety: avoid aggressive filing at the base; plan soak-off removal.