Poly gel blends the strength of acrylic with the pliability of gel, giving both beginners and professionals a forgiving material for building, sculpting, and overlaying nails. This guide breaks down key terms, tools, and a clear step-by-step workflow so you can get consistent results from your first try.
What is poly gel and why it’s useful
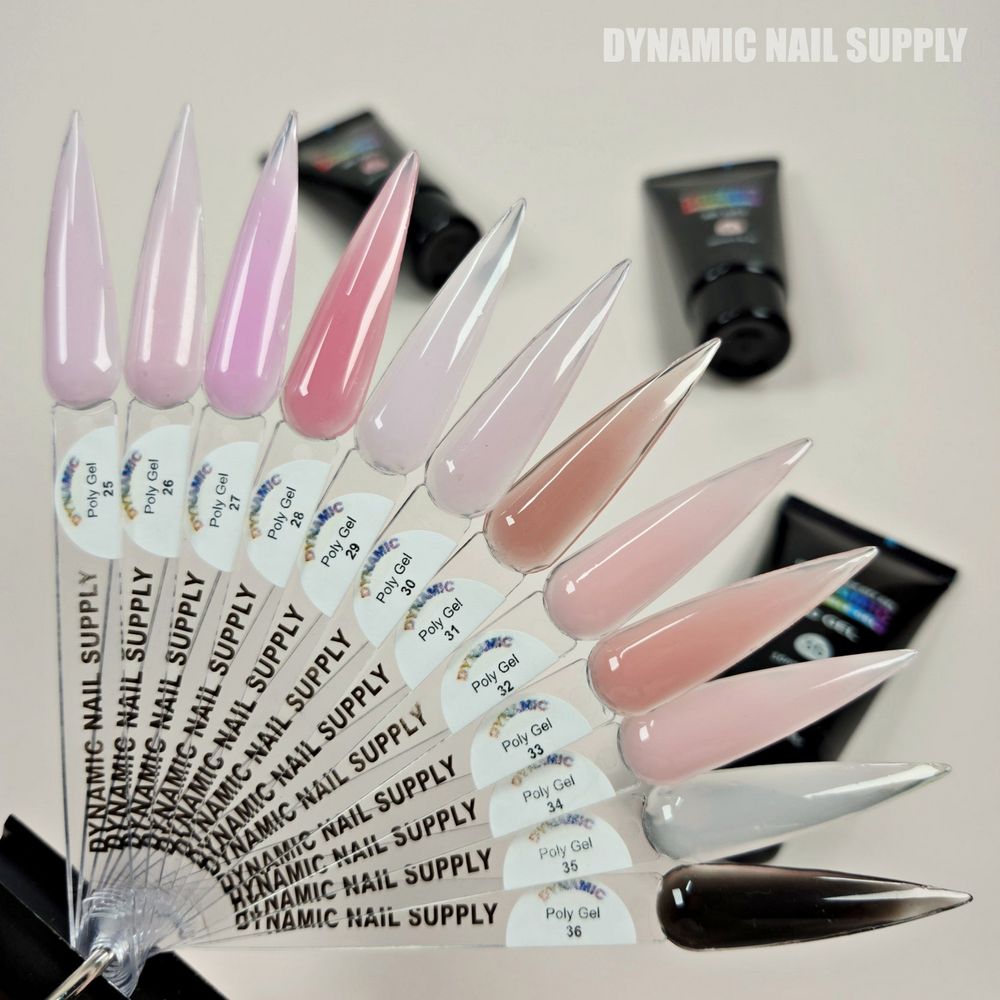
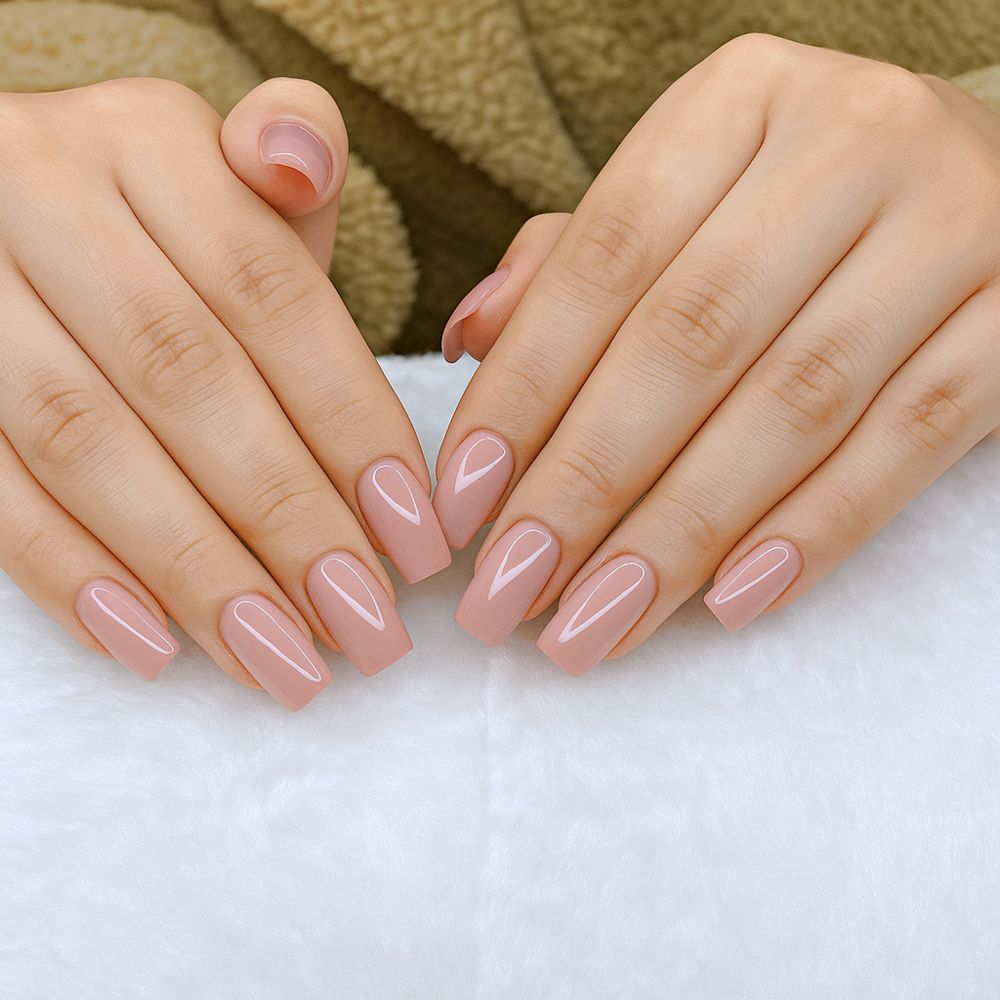
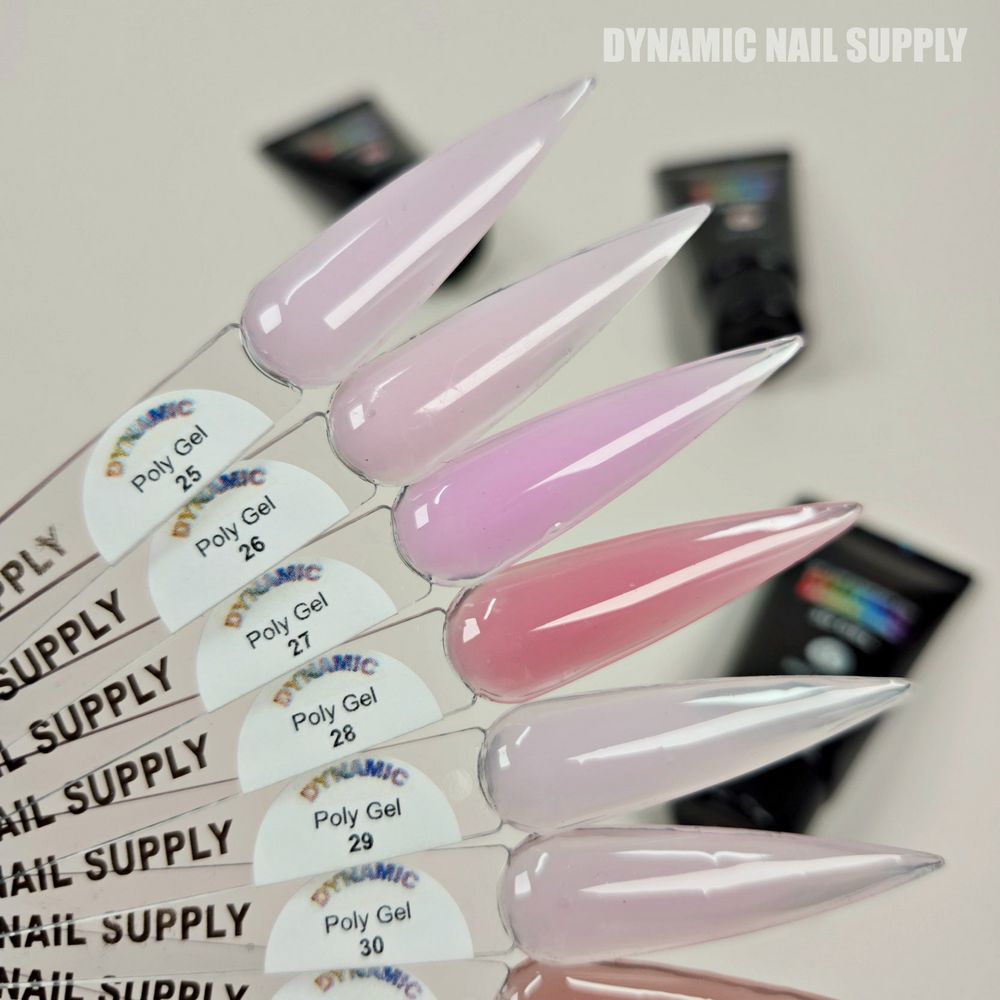
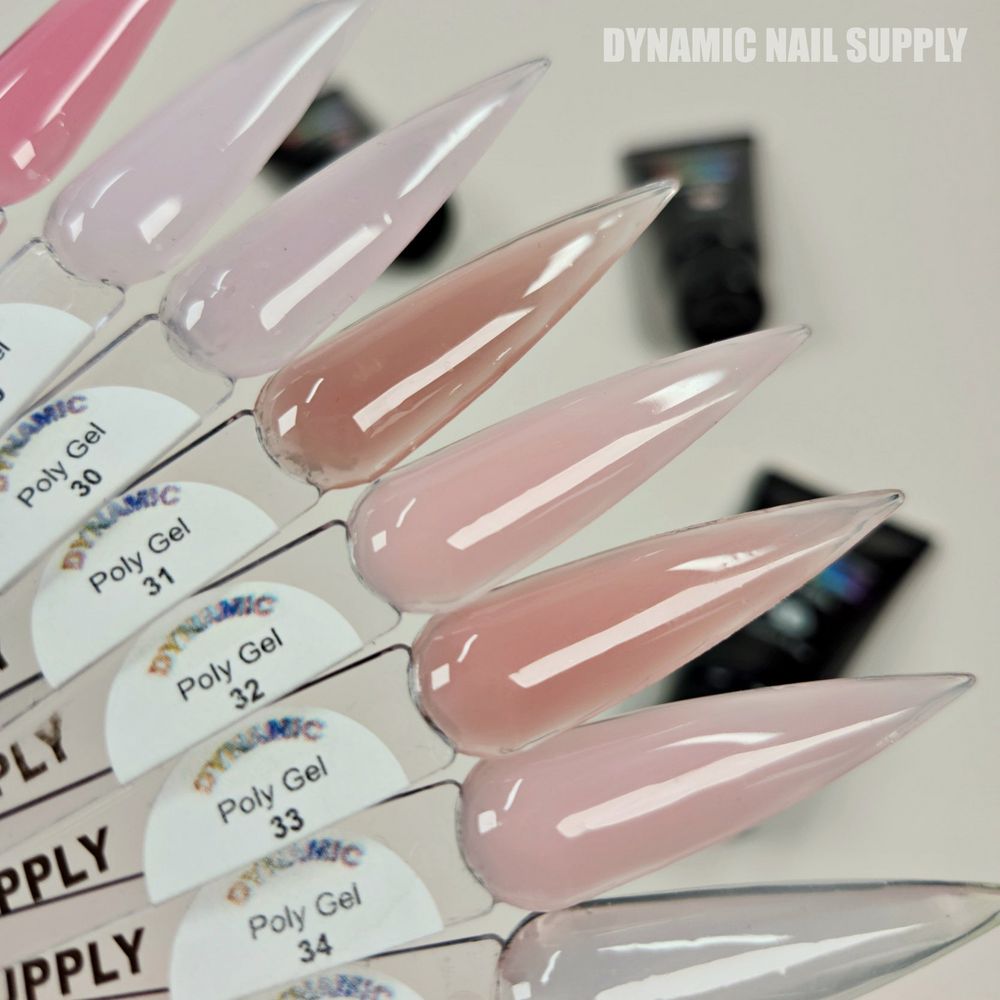
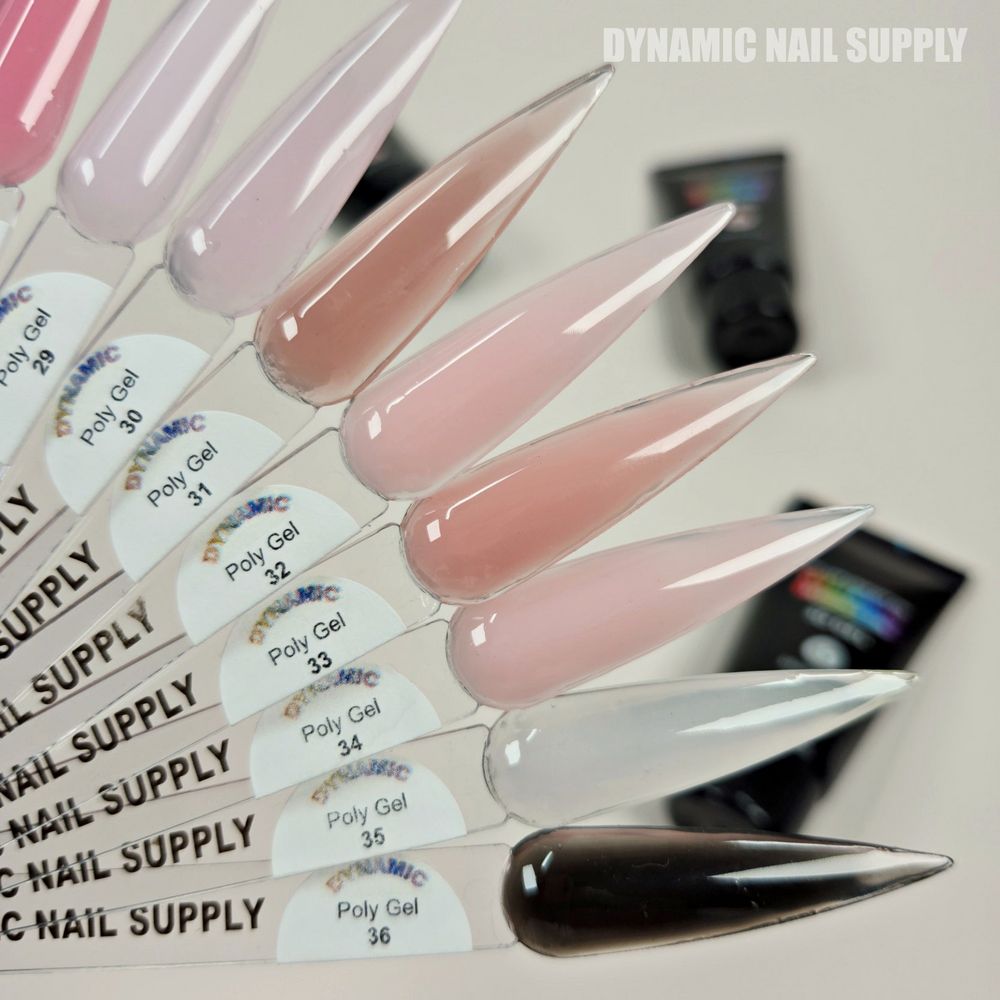
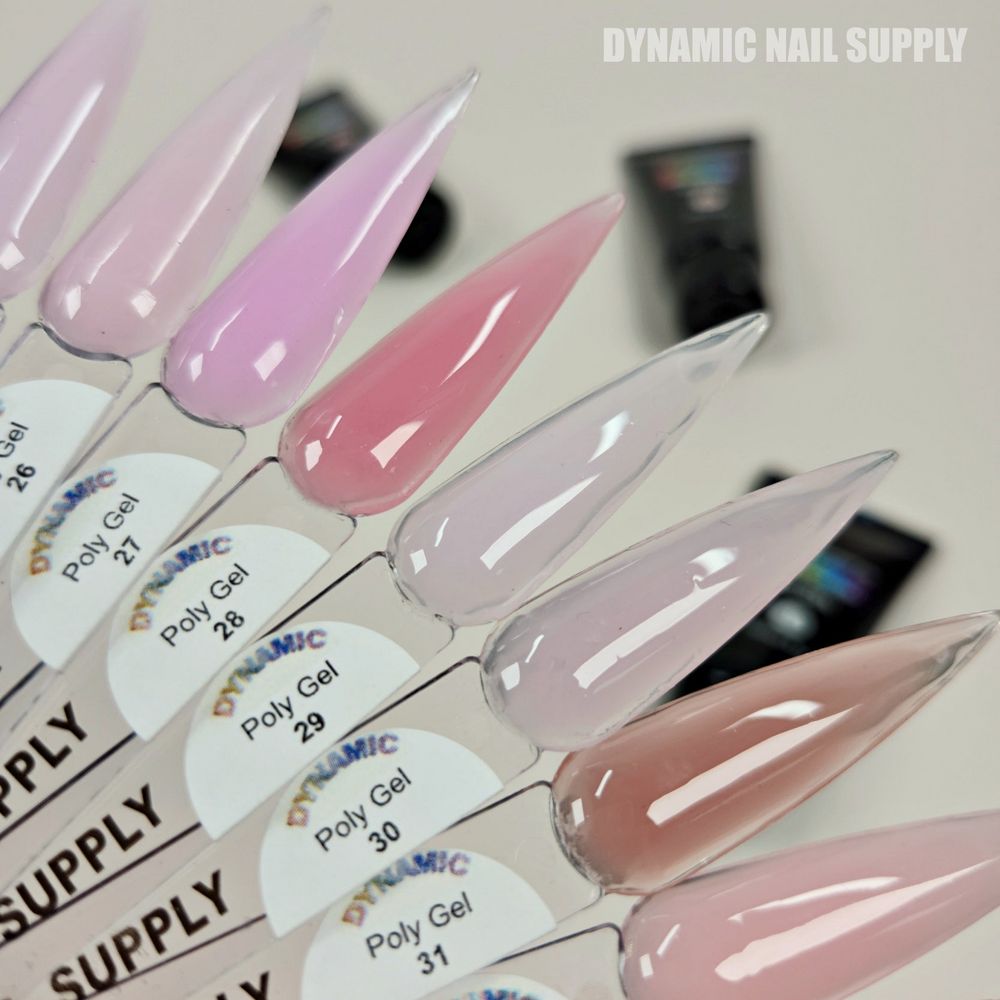
Poly gel is a hybrid enhancement system designed to provide structure like acrylics while keeping the smooth finish and flexibility of gel. The 15g tubes in this collection come in a range of neutral shades (Color 25–36) and offer a texture that’s easy to manipulate — not too runny, not too stiff — which helps when sculpting apexes and creating extensions.
Key terms every beginner should know
- Builder gel / Acrygel / Polygel: Different names you may see for similar hybrid products used to create strength and length.
- Slip solution: A liquid used on the brush to help shape and smooth poly gel without dragging it.
- Dual forms / Nail forms: Tools that give the poly gel a consistent curve while curing — useful for sculpted lengths.
- LED/UV lamp: The light source used to cure poly gel quickly and safely.
Tools and materials you’ll need
- 15g poly gel tube in your chosen shade (Color 25–36)
- Slip solution or 99% isopropyl alcohol
- Silicone-tipped spatula or brush designed for poly gel
- Forms or dual forms for sculpting, or short tips for overlays
- LED/UV lamp for curing
- Fine file and buffer for light refinement
- Base coat and top coat compatible with gel systems
Step-by-step: sculpting poly gel for beginners
- Prep the natural nail: Gently push back cuticles, dehydrate the nail plate with nail prep or alcohol, and buff lightly to remove shine.
- Choose your support: Decide between dual forms, plastic nail forms, or direct overlays on the natural nail depending on the length and shape you want.
- Dispense a bead: Squeeze a small bead of poly gel from the 15g tube onto the form or directly on the nail. A little goes a long way; start smaller and add if needed.
- Shape with slip solution: Dip your brush in slip solution, then glide it over the poly gel to spread and shape the product into place—focus on sidewalls and a balanced apex.
- Cure under lamp: Place the nail under an LED or UV lamp and cure according to the lamp’s recommended time. Poly gel cures quickly and typically gives a low-heat sensation.
- Remove and refine: Pop off dual forms or remove the support, then file and buff gently to perfect edges and surface texture. Minimal filing is often enough thanks to the smooth initial finish.
- Seal with top coat: Apply a compatible top coat and cure to lock in shine and protection.
For a compact starter routine, consider practicing overlays first before attempting longer sculpted extensions; you can gradually build length as your confidence grows. If you want to compare shades or tube handling, check the poly gel 15g tubes to view available colors and options.
Practical tips to avoid common beginner mistakes
- Work in small sections: large beads can be harder to control and shape evenly.
- Use minimal product at the apex — you can always add a thin layer if more strength is needed.
- Keep slip solution sparing; too much will thin the poly gel and cause slipping.
- When curing, make sure the nail sits flat under the lamp to prevent uneven polymerization.
- If you detect a sticky inhibition layer after curing, gently wipe with alcohol before top coating.
Key features in a practical context
The hybrid formula provides a useful balance of rigidity and flexibility, which means sculpted extensions hold shape yet feel comfortable to wear. The non-sticky feel speeds up shaping and keeps tools clean, while the low-odor profile improves the salon environment for both tech and client. Minimal filing required and resistance to lifting or chipping make the system efficient for busy schedules.
Who should use this poly gel
This product suits ambitious beginners and seasoned nail techs alike. Beginners will appreciate the forgiving consistency and straightforward workflow; professionals will value the speed and reliable structure for client services. The color range (25–36) includes neutral tones and a black shade for variety. Individual tubes are priced at $6.00 each, but prices may change.
Care, safety, and finishing notes
- Wear nitrile gloves if you have sensitive skin and avoid direct contact with uncured product.
- Work in a well-ventilated space even though the formula is low-odor.
- Cure fully under an appropriate LED/UV lamp to ensure strength and reduce any tacky residue.
- Store tubes upright in a cool, dry place and keep caps tightly closed to preserve consistency.
Dynamic Nail Supply designed this poly gel collection to be approachable for learners while delivering professional-grade results. With practice and the right tools, you can sculpt durable, salon-worthy nails using the steps above.
Start small, follow the curing and shaping steps, and you’ll see steady improvement each service.